If you’ve gone through the trouble of creating buttons for your WordPress site, you probably want to know whether or not people are actually clicking on those buttons, right?
Understanding which of your buttons are racking up the most clicks helps you know what works and, equally as important, what doesn’t work.
But if you want to track button clicks on your WordPress site, you’re going to have to put in a little prep work. Depending on your desired method, this work ranges from inputting a few bits of text in the MaxButtons plugin, editing HTML code, or digging into the complicated Google Tag Manager interface.
No matter what your preferred method is – we’ll show you how to do it for your WordPress site.
What You Need To Track Button Clicks On WordPress
We’re going to show you 99% of what you need to do to track button clicks on WordPress. But there is one thing that you will need before jumping into this guide:
A Google Analytics account with the Google Analytics tracking code added to your website. If you already have that – you’re set to move on!
If not, you can read this post for a detailed guide on how to setup and configure Google Analytics.
How To Track Button Clicks With Google Analytics Event Tracking
Google Analytics Event Tracking is a feature that lets you track how users interact with your content. As the name suggests, this tracking comes in the form of “events.”
While events can be all kinds of different things, for this article, we’re specifically interested in “clicks” as the event that’s tracked.
With Event Tracking, you can track individual button clicks on your WordPress site and, if desired, even assign a numeric value to each click.
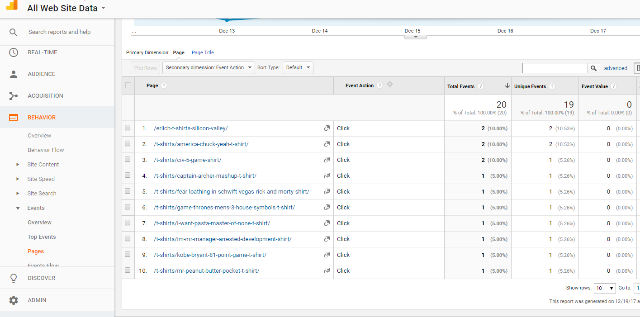
Once you get it set up, you’ll be able to view Google Analytics reports like below for all the button clicks on your WordPress site:
Event Tracking lets you collect four pieces of information about each event – two pieces are required, and the other two pieces are optional:
- eventCategory – required – the object that your visitor interacted with. For this use, it would be something like “button”, or maybe even a specific type of button on your site
- eventAction – required – what the visitor did. For this use, it would be something like “click” (because that’s what people do with buttons!)
- eventLabel – optional – lets you add additional categorization. For example, you could tag some button clicks as “affiliate link”
- eventValue – optional – lets you add a numeric value to the click. If you just want to track which buttons a user clicks on, you probably don’t need to worry about this one
How To Track WordPress Button Clicks With MaxButtons Pro
MaxButtons is a free plugin that helps you create stylish buttons on WordPress. If you purchase MaxButtons Pro, you’ll gain the ability to easily add Google Analytics Event Tracking to your WordPress buttons right from the MaxButtons interface.
To get started, create a regular button using MaxButtons. If you’re not sure how to do that, we wrote a detailed guide on how to create WordPress buttons with MaxButtons.
Once you’ve created your button, all you need to do is:
- Scroll down to the bottom of the Button editor interface
- Find the Google Event Tracking for Button Clicks box
- Turn the Enable Event Tracking toggle on
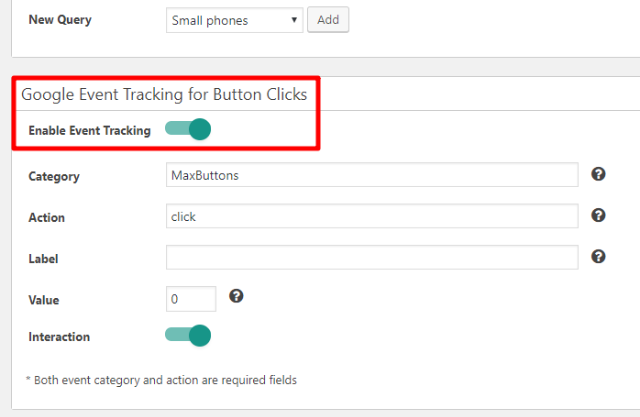
Then, you need to fill in the information for Category, Action, Label, and Value. If you remember from a second ago, only Category and Action are required.
Let’s say that you want to specifically track a group of buttons that allow your visitors to purchase different eBooks on your site.
In total, you sell 5 different eBooks, with one of them being named “Beginner’s Guide To Credit Card Churning”.
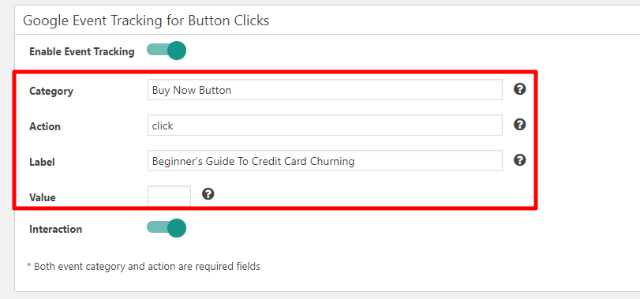
Here’s a good way that you could configure the four boxes:
- Category – “Buy Now Button” – this indicates that this is one of the many buttons that lets a visitor purchase an eBook
- Action – “click” – this indicates that the visitor actually clicked on the button
- Label – “Beginner’s Guide To Credit Card Churning” – this indicates that the visitor clicked on the specific buy now button for the “Beginner’s Guide To Credit Card Churning” eBook. You could also put the specific page where the button is located (e.g. homepage)
- Value – blank – while you could add a value here, making this value helpful/accurate can be a little tricky
Finally, the last thing you need to do is choose whether you want a button click to be counted as an:
- Interaction Event – a user who clicks on the button will not be counted as a “bounce”
- Non-interaction Event – whether or not a user clicks on this event will not be factored into the bounce rate. That is, a user can click on the button and still count as a bounce
Most of the time, we recommend leaving this setting turned on because it gives a more accurate look at how engaged your visitors are. If you’re not sure what we’re talking about when we say “bounce rate,” we recommend just leaving it turned on (the default).
Once you input all the details, all you need to do is save and insert your button like normal using the MaxButtons shortcode.
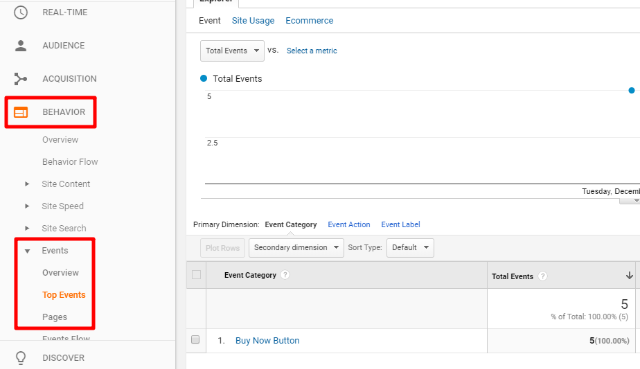
Now, whenever a user clicks on that button, you’ll be able to view that data in your Google Analytics account by going to Behavior → Events:
How To Track Button Clicks Manually By Adding HTML/JavaScript
If you’re not using MaxButtons, it’s possible, though a bit time-consuming, to manually add the same code to the buttons on your site.
Essentially, you need to add this short code snippet inside the HTML for your link:
onclick=”ga(‘send’, ‘event’, ‘CATEGORY’, ‘ACTION’, ‘LABEL’, {nonInteraction: true});”
Let’s go back to the example from the MaxButtons section.
If you wanted to track a similar set of data, your complete button HTML would look something like this:
<a href=”https://www.yourebook.com” class=”buybutton” onclick=”ga(‘send’, ‘event’, ‘Buy Now Button”’, ‘click’, ‘Beginner’s Guide To Credit Card Churning’, {nonInteraction: false});”>Buy This eBook</a>
If you’re working with the WordPress Editor, you’ll need to exclusively add this code in the Text tab:
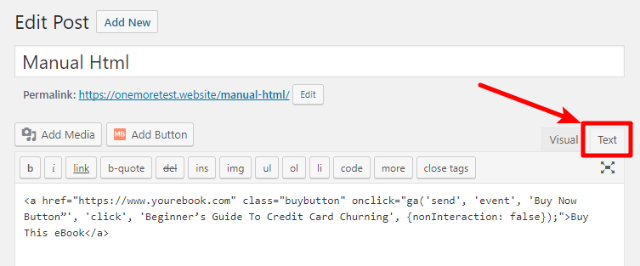
If, at any point, you switch to the Visual tab, the WordPress Editor will strip out your Event Tracking code, which is a pretty big pain.
For that reason, using MaxButtons is often a simpler way to implement Event Tracking for buttons that you use in regular WordPress content.
How To Track Button Clicks On WordPress With Google Tag Manager
Google Tag Manager is another way that you can track button clicks on WordPress with Event Tracking.
It’s not very user friendly (in fact, we don’t recommend it for beginners), but for power users, Google Tag Manager provides a flexible way to track button clicks on WordPress.
To use Google Tag Manager, you’ll need to:
- Sign up for a Google Tag Manager account
- Add the Google Tag Manager snippets in your header and after the opening <body> tag on your site, respectively
Both of these steps are in addition to already having Google Analytics configured on your WordPress site (or, you can also use Google Tag Manager to add the Google Analytics tracking code, if desired).
Once you have the Google Tag Manager codes active on your WordPress site, here’s how to use Google Tag Manager to track button clicks in WordPress.
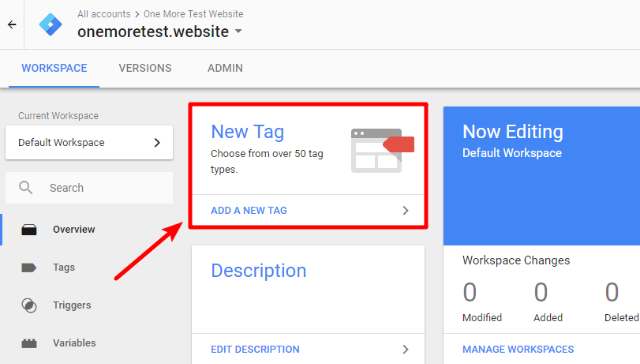
Step 1: Create A New Tag
In your Google Tag Manager workspace, click the New Tag button:
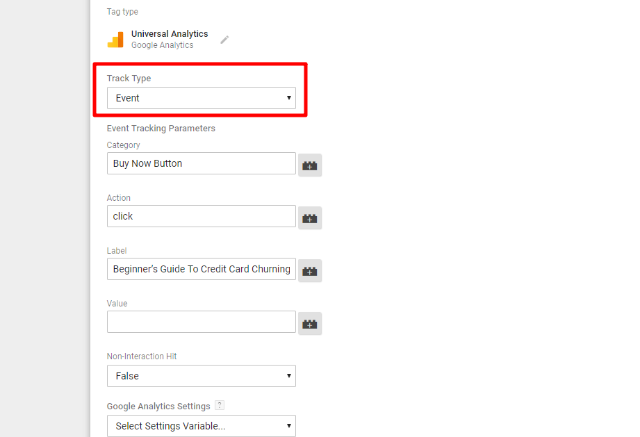
Step 2: Set Tag Configuration
Next, click in the Tag Configuration box to choose the type of tag. Select Universal Analytics:

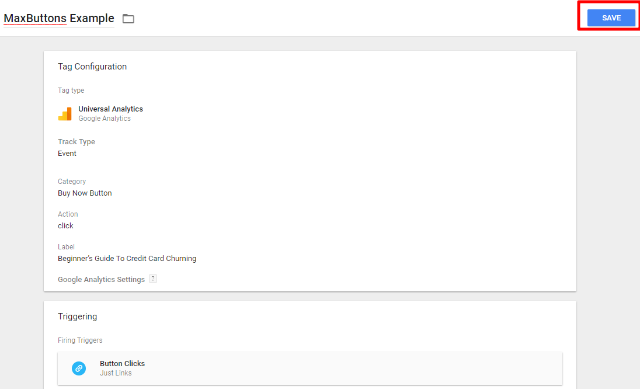
Then, select Event under the Track Type box and enter the Category, Action, and Label (this are the same terms as used in the previous sections):
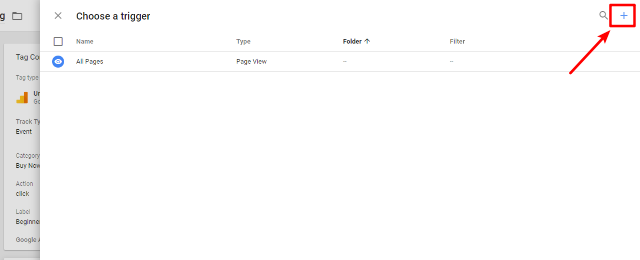
Step 3: Choose When To Trigger Event
Once you finish the tag configuration, scroll down and click on the Triggering box to set when the tag should “fire” (that is, when Google Tag Manager should log a new click).
Then, click the + button in the top-right corner:
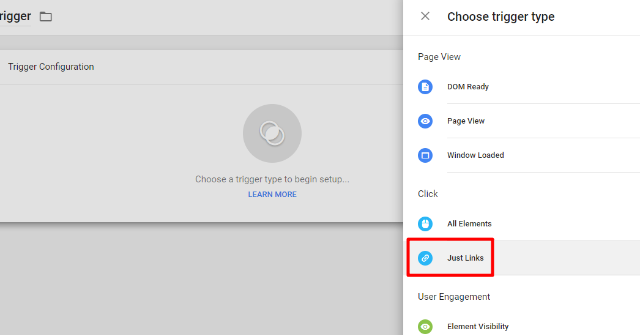
Click in the Trigger Configuration box to open another set of options and choose Just Links:
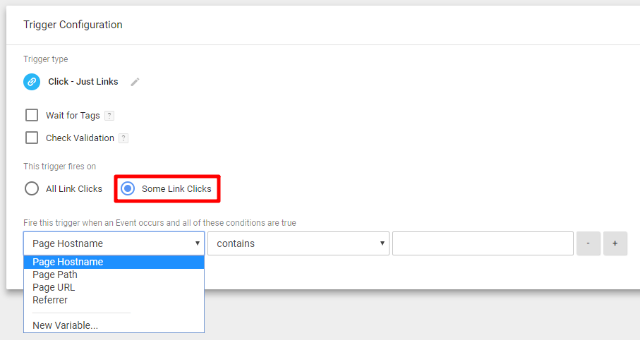
If you want to track every single button click with the same category, then you can stop now. But if you just want to track specific button clicks, you need to check the box for Some Link Clicks. Then, you can use the drop-down to trigger the Event by various criteria:
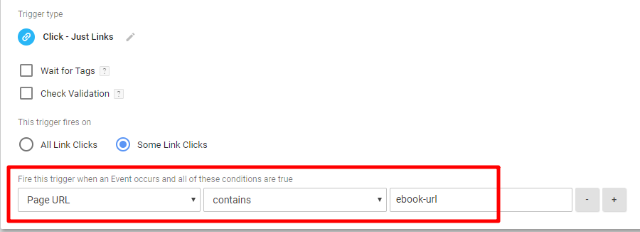
For example, to only track button clicks on your “yourdomain.com/ebook-sale” page, you could enter “ebook-sale” in the Page URL contains box
Another thing that you could do is only target certain buttons based on each button’s CSS class.
Once you’re finished, click SAVE in the top right corner. Then click SAVE again:
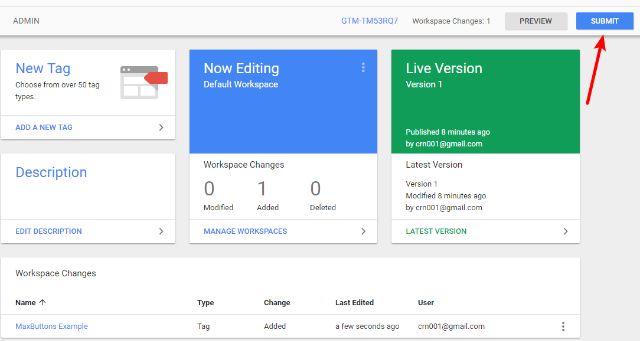
Step 4: Publish Your Tag
Almost done! Now, all that’s left to do is publish your tag. To do that, first click the SUBMIT button in the top-right corner:
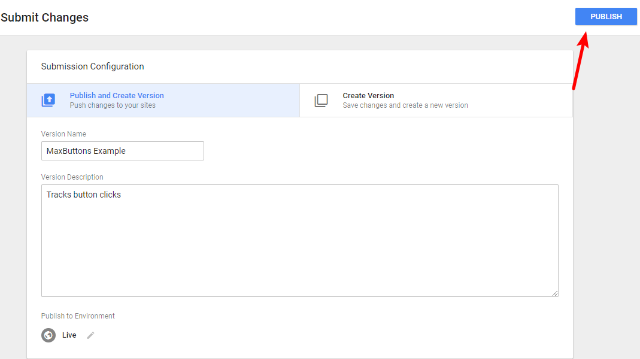
Then, give it a name and description and click PUBLISH:
You’re Ready To Track Button Clicks In WordPress
If you’re just looking for the simplest way to track button clicks on your WordPress site, the MaxButtons Pro interface lets you quickly get started without needing to dig into code or deal with the fairly complicated Google Tag Manager interface.
Otherwise, manual Event Tracking is the next simplest solution – you just need to remember to avoid the Visual tab of the WordPress Editor. And if you’re a power user, you can dig into the Google Tag Manager interface – but casual users are definitely better off steering clear.