If you’re trying to get visitors to sign up for your email list, register at your site, or send you a message, using a two-step opt-in is a powerful approach.
With a two-step opt-in, your visitor clicks on a button to open a popup that displays a form to collect more information. This can actually boost your conversion rate (vs showing the form right away) because it harnesses something called the Zeigarnik effect to make people more likely to fill out your form.
There are also plenty of other niche uses for an onclick popup on your WordPress site that go beyond forms.
But unless you know how to code, this functionality can be difficult to achieve for most webmasters. To help, we’re going to show you exactly how to open a popup after a visitor clicks a button using two free WordPress plugins:
No code required!
As the names imply, you’ll use MaxButtons to create the button, Popup Maker to create the popup, and then you’ll link them together through a simple integration.
Let’s dive in!
*You can also apply these principles to many other popular popup plugins. We just chose Popup Maker because it has the most installs at WordPress.org.
Step 1: Create Your Popup With Popup Maker
To get started, you should first create the popup that you want to display using the free Popup Maker plugin:
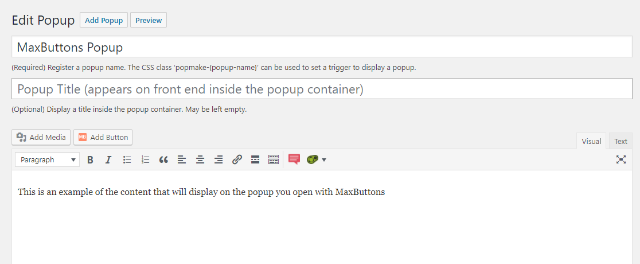
We’re not going to cover every single option in the Popup Maker interface because it’s a bit outside the scope of this post. But if you need help, Popup Maker has great support docs. This “Creating Your First Popup” guide is a good place to start.
If you’re looking to display a form in your popup, you can use a form plugin and then simply add the form’s shortcode to your popup. Caldera Forms is a good free option for creating flexible forms.
You do not need to worry about setting any Triggers or Targeting for this specific popup. The method that you’ll use to open the popup with MaxButtons makes these unnecessary:
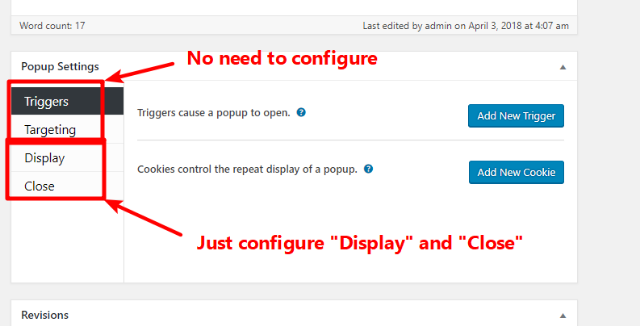
Once you’ve finished designing your popup and its content, make sure to Publish it.
Step 2: Create Your Button With MaxButtons
Once you’ve installed and activated the MaxButtons plugin, go to MaxButtons → Add New to create your button.
Again, we’re not going to cover every single setting in the general button interface. But if you want some help designing your button, our post on how to create buttons in WordPress has a full explanation of every single option in the MaxButtons interface.
In the Basics section, make sure to enter the Text for your button. You can leave the URL field blank, though (remember – the button will open a popup, so the URL is unnecessary):
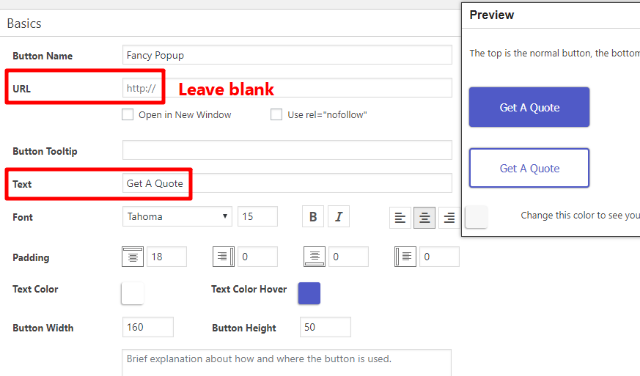
You can style your button as desired using the various settings below that. As you make style changes, you’ll see them reflected in the live Preview.
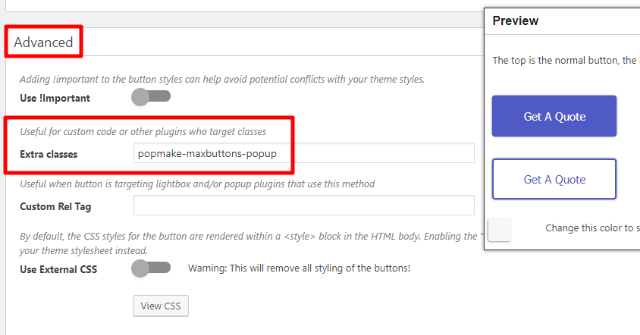
The only other setting that you must configure is in the Advanced section.
Specifically, you need to add some text to the Extra classes box. This is what tells the button to open the popup that you created with Popup Maker.
To find the text that you need, click on Popup Maker in your WordPress dashboard (use a new tab so that you still have access to the MaxButtons interface). Then, look for the CSS Classes column:
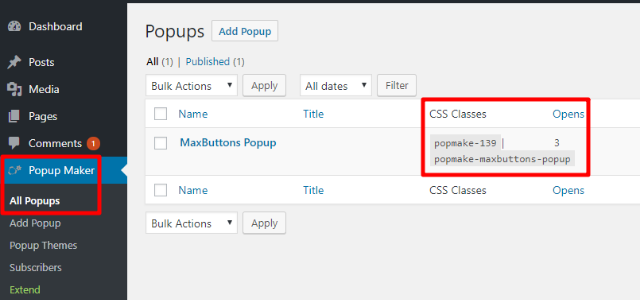
Copy one of the values in that column (it doesn’t matter which value you use). Then, go back to the MaxButtons interface and paste that value into the Extra classes box*. It should look something like this:
And that’s it! Once you’re happy with how the rest of your button looks, make sure to Save it.
*You can also use the Custom Rel Tag and data fields options to connect to other types of popup plugins.
Step 3: Add Button With Shortcode
Now, all you need to do is add the MaxButtons shortcode where you want the button to appear. You can add this shortcode in a:
- Post
- Page
- Text widget
- Page builder
- Anywhere else that accepts shortcodes
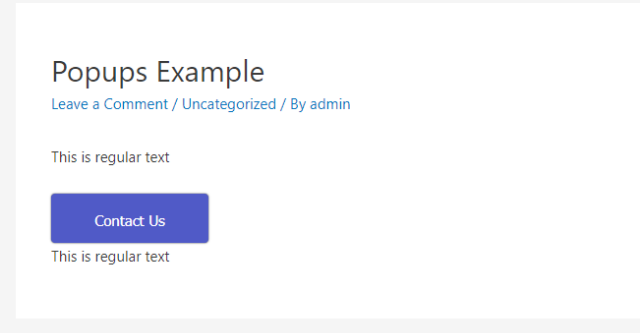
You can see an example of the finished functionality below (you can adjust the dimensions of your popup with Popup Maker – you’re not forced to make it full screen like our example):
If you want to open the same popup but with different text, you can use the text shortcode parameter to change the button’s text.
For example, modifying your shortcode like this…
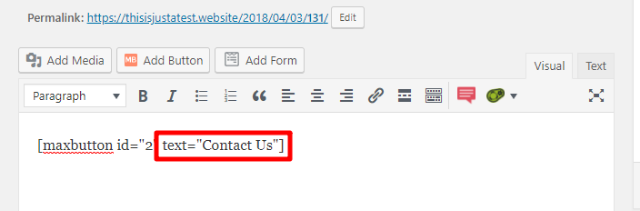
…causes the button text to change. The popup functionality will function exactly the same as before, though.
Recapping What You Learned
Let’s end with a quick recap of the most important steps to implement this functionality. Beyond using the regular Popup Maker and MaxButton interfaces, you should:
- Ignore the Triggering and Targeting options in Popup Maker
- Ignore the URL box in MaxButtons
- Add the CSS Class from the Popup Maker interface to the Extra classes box in the Advanced section of MaxButtons
Then, you can use the MaxButtons shortcode to add the button/popup anywhere on your site. And you can also use the text shortcode parameter to reuse the same button with different button texts.
We hope you found this guide useful. Now, go create something awesome with your new knowledge!